With this new feature you will able to create complex forms at ease. This feature could be used in so many ways to gather data: survey/opinion pool, contact form, event registration, cost estimate request, custom made item request, appointment taking …
Here are the main characteristics:
- Data entries saved into database.
- Sent data by email.
- Confirmation email to user sending the form with customizable message.
- Export to CSV or JSON.
- 13 different field types: text, longtext, email, Image (upload), number (with decimal precision),number range, date, time (AM/PM, 24hrs format), toggle (on/off), select list, multichoice select, color list and upload pictures.
- Good form presentation: Html header, footer and separator.
- Redirection to a specific feature afterwards.
- Fine-grained configuration
- Decent UI/UX: highlight required missed field, placeholder and field description, proper Date selection modal and proper Time selection modal.
Getting started
- Add preciseform feature to your app
- Configure you form:
There is «model» pannel where your can add/edit field of your form.
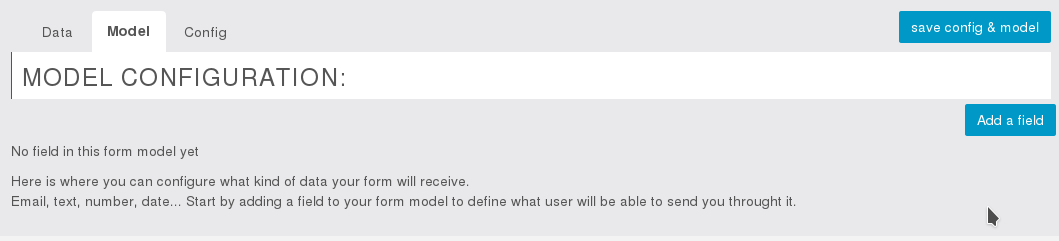
How to add a field to my form ?
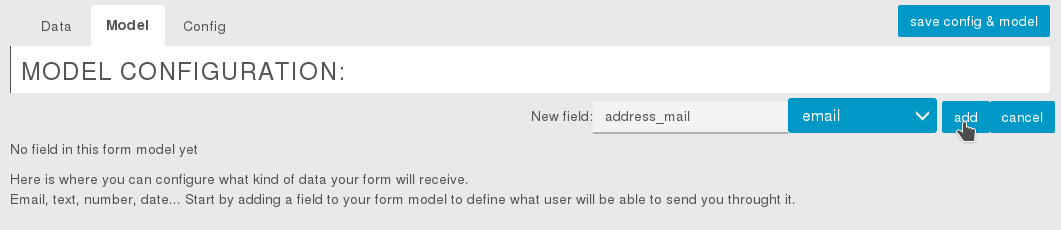
– Click on «Add a field»
– Enter field unique id, select field type then click on «add»
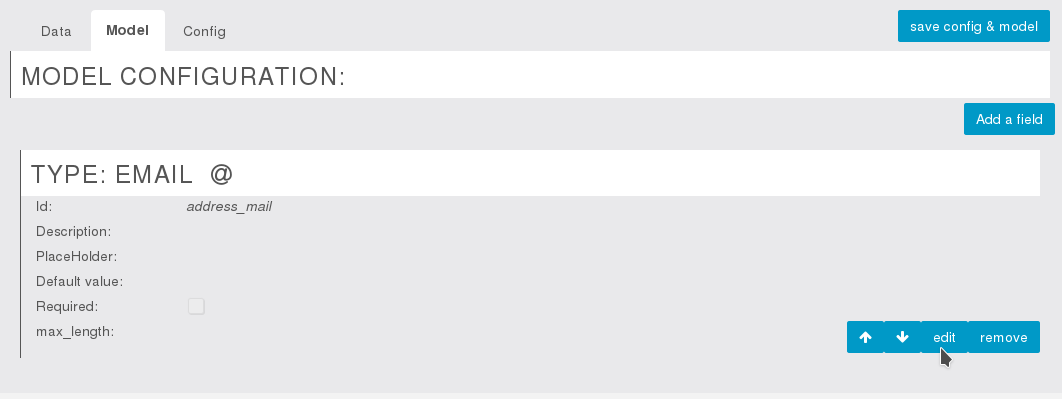
The new created field appear at the bottom of the page. You can edit it’s properties .
Finally to save change:
– Click on «save config & model»
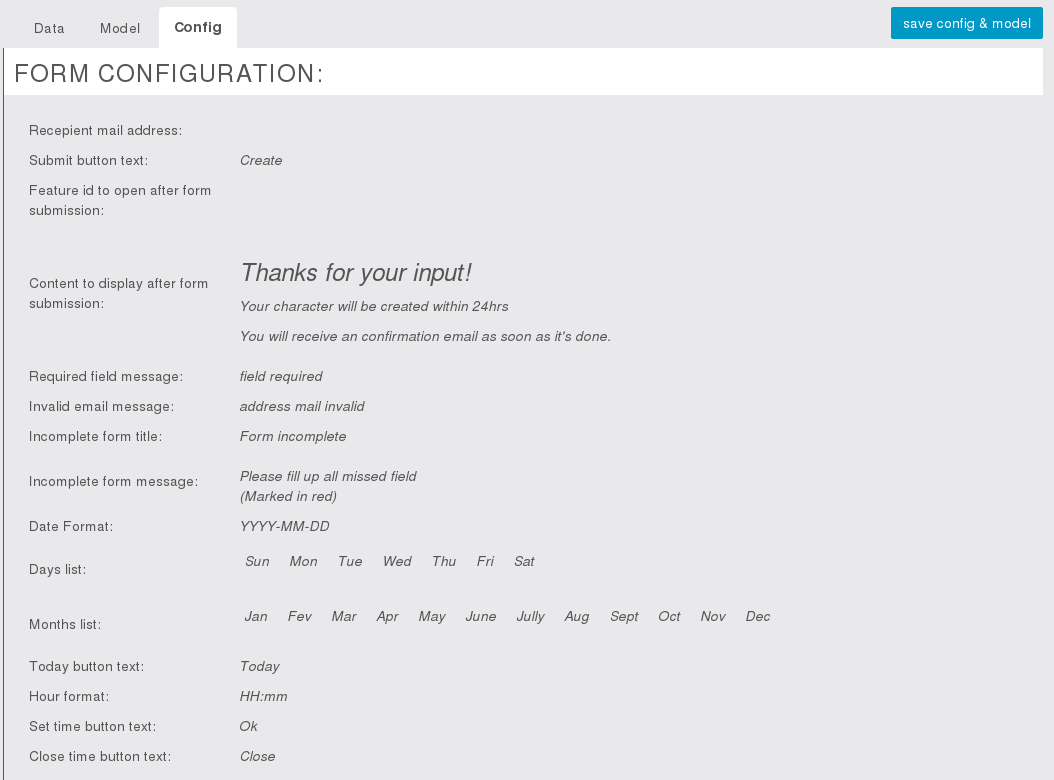
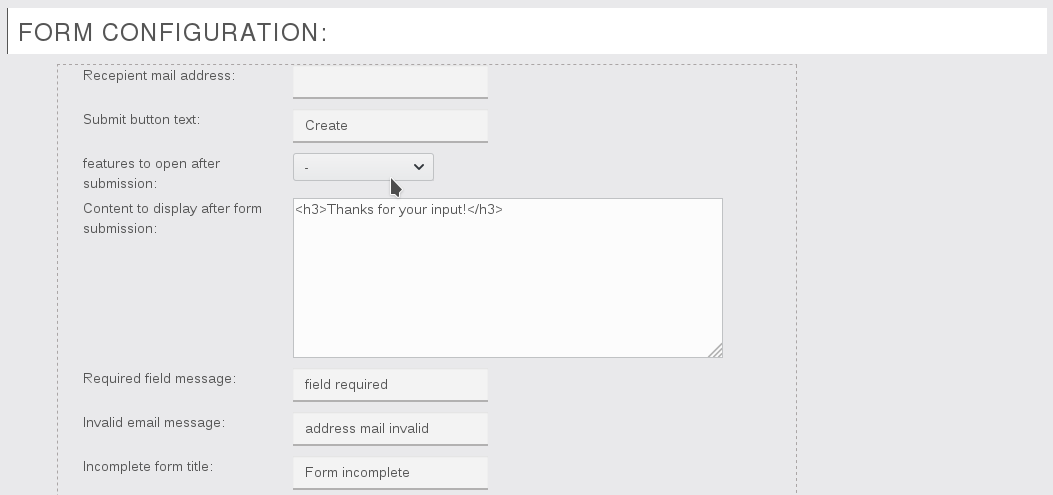
And «config» pannel where you can setup error message, date format, address email to sent form data, form html header and form html footer:

How to configure my form ?
– Click on «config» pannel
There you will see the configuration of your form.
– click on edit to change it
– change header to add some introduction text to your form
– click on apply
Finally to save change:
– click on «save config & model»
To see the change in App overview you will need to reload the page
or navigate to an other feature then go back to preciseform.
How to add a Header to my form ?
– click on «config» pannel
– click on «edit»
– go to «Header» field
There you can add plain text or html if you like:
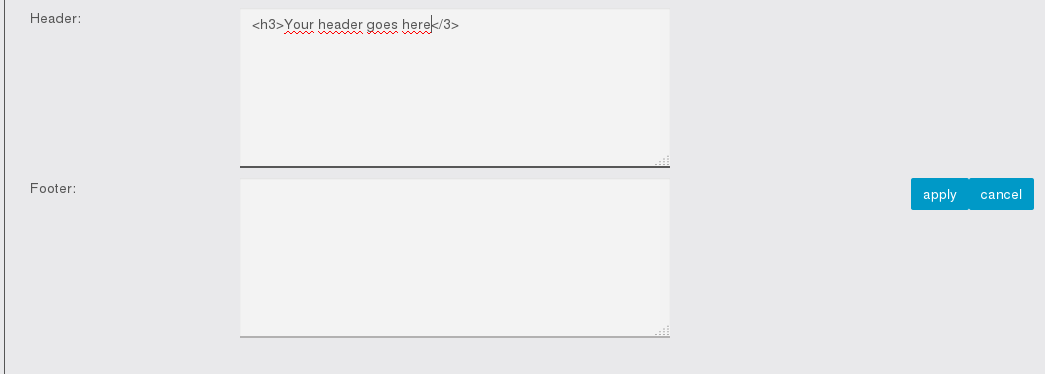
Finally to save change:
– click on «apply»
– click on «save config & model»
How to add a Footer to my form ?
– click on «config» pannel
– click on «edit»
– go to «footer» field
There you can add plain text or html if you like:
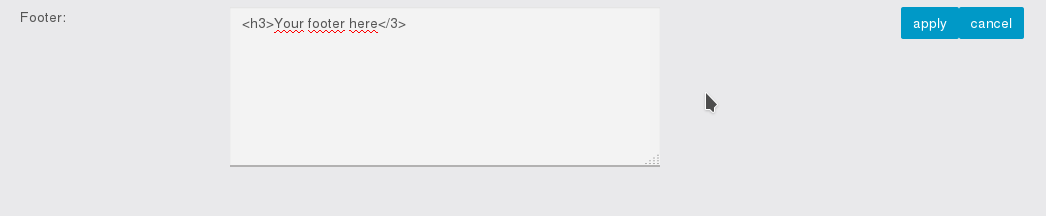
Finally to save change:
– click on «apply»
– click on «save config & model»
How to redirect user to a specific feature after he submitted form ?
– click on «config» pannel
– click on «edit»
– go to third field «features to open after submission»
There you can select the feature to open:
Finally to save change:
– click on «apply»
– click on «save config & model»
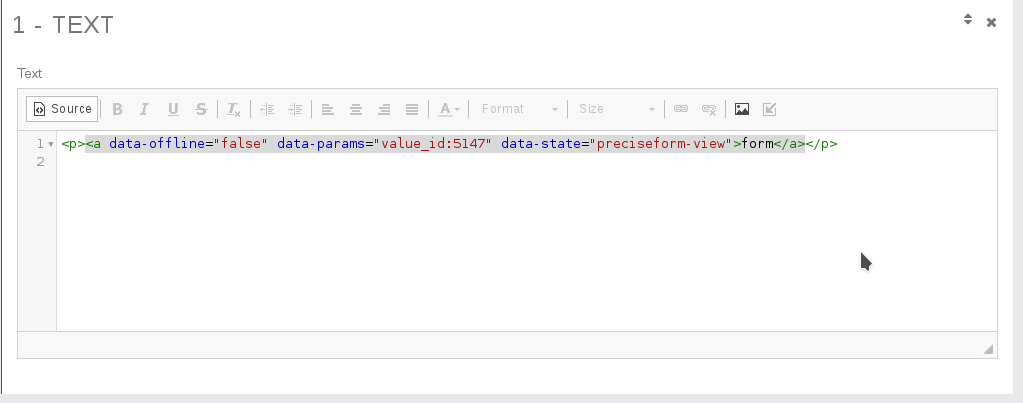
How to add internal link from custom page ?
To add a link to your form within a custom page:
First you will need to the «value_id» of your preciseform page.
Form your editor, put the mouse over preciseform page icon (In «YOUR PAGES»).
With mouse over it you should an url appear at the bottom of your browser looking like this:
https://zerocodes.net/preciseform/application/edit/option_value_id/5147
Here 5147 is the «value_id». Memorize the one of your preciseform page.
- Add a section «Text» to your custom page
- Click on source to edit the HTML content of the section
- Add the following HTML code (don’t forget to replace 5147 by your value_id code:
How to always display field description ?
Field description appear when user start typing in it. If you want description to be display no matter what go to «colors» section.
– Into section «ADVANCED CUSTOMIZATION CSS / SCSS»
– click on «show»
– Add this custom CSS to your app:
/* always display description */
.item-floating-label .input-label {
opacity: 1 !important;
top: 0px !important;
}
– Finally click on «save»
How to background color make select, range and other field transparent ?
From ZeroCodes app editor, go to «colors» section.
– Into section «ADVANCED CUSTOMIZATION CSS / SCSS»
– click on «show»
– Add this custom CSS to your app:
/* preciseform transparent item */
precise-form .item {
background-color: transparent;
}
/* preciseform transparent select */
precise-form .item-select select {
background-color: transparent;
}
– Finally click on «save»
How to change form background color ?
From ZeroCodes app editor, go to «colors» section.
– Into section «ADVANCED CUSTOMIZATION CSS / SCSS»
– click on «show»
– Add this custom CSS to your app:
.precise-item .button.button-positive {
border-color: transparent!important;
background-color: rgb(254, 148, 56)!important;
color: #fff!important;
}
– Finally click on «save»
How to adapt color to dark background ?
On a black blackground fields are not really visible, you can fields text color so it will render well by adding additional css.
From ZeroCodes app editor, go to «colors» section.
– Into section «ADVANCED CUSTOMIZATION CSS / SCSS»
– click on «show»
– Add this custom CSS to your app:
.precise-item input.precise-text-input, .precise-item textarea.precise-text-input {
border-bottom: 1px white solid;
}
/* fields border and description color when you enter something into */
.precise-item input:focus.precise-text-input, .precise-item textarea:focus.precise-text-input {
border-bottom: 2px white solid;
}
.precise-item .precise-text-input.input-label.focused {
color: white;
}
.precise-item .precise-text-input.input-label {
font-size: 90%;
}
.precise-item .precise-text-input.input-label {
color: white;
color: rgba(0, 0, 0, 0.54);
}
.precise-item .precise-text-input.require-span, .precise-item .error {
color: red;
font-size: 90%;
}
.precise-item button.error {
border-bottom: 2px red solid;
}
.precise-item input.precise-text-input.error, .precise-item textarea.precise-text-input.error {
border-bottom: 2px red solid;
}
.precise-form input, .precise-form label {
color: white !important;
}
.precise-item span.precise-text-input.input-label.error {
color: red;
}
.precise-form .input-label {
color: white;
}
– Finally click on «save»
How to change buttons color ?
From ZeroCodes app editor, go to «colors» section
– Into section «ADVANCED CUSTOMIZATION CSS / SCSS»
– click on «show»
– Add this custom CSS to your app:
.precise-item .button.button-positive {
border-color: transparent!important;
background-color: rgb(254, 148, 56)!important;
color: #fff!important;
}
– Finally click on «save»
How to change placeholder text color ?
From ZeroCodes app editor, go to «colors» section
– Into section «ADVANCED CUSTOMIZATION CSS / SCSS»
– click on «show»
– Add this custom CSS to your app:
.precise-item *::placeholder {
color: red;
}
.precise-item *::-webkit-input-placeholder {
color: red;
}
– Finally click on «save»
How to increase field description font size ?
From ZeroCodes app editor, go to «colors» section
– Into section «ADVANCED CUSTOMIZATION CSS / SCSS»
– click on «show»
– Add this custom CSS to your app:
.precise-item .input-label {
font-size: 24px !important;
}
– Finally click on «save»
How to reduce date header font-size (list of days in calendar) ?
From ZeroCodes app editor, go to «colors» section
– Into section «ADVANCED CUSTOMIZATION CSS / SCSS»
– click on «show»
– Add this custom CSS to your app:
/* preciseform reduce days header size */
.ionic_datepicker_popup .font_bold {
font-size: 89%;
}
– Finally click on «save»