This is a module that allows to send automatic pushes when a specific event/trigger is happening.
It is an innovative tool that is perfect for Direct Response Marketing, for example delivery an high value content with the APP and later followup the users with special contents delivered by push periodically and automatically, for example every week.
With this new feature you can now also set up email funnels, thanks to the interface with the most popular email marketing systems.
Push Funnels
The events/triggers supported until now are:
- App installation
- Registration of an user inside the app
- First Loyalty Card point validated from the user
- First Order made from the user
- First Coupon used from the user
When one of this events/trigger is happening we are able to start a FUNNEL OF PUSH, a sequence of unlimited number of pushes scheduled to be sent automatically to the user.
Every push has a delay of hours or days from the previously push selected.
Is possible to setup a welcome push immediately after the registration of a new user and schedule every 7 days an automatic push sent to the user for an entire year!!
Follow the instruction to understand how to setup your FUNNEL OF PUSHES.
When you activate the feature add to the menu of your APP a page that has the target to allow the final user of the APP to UNSUBSCRIBE from the automatic push service. Here in the screenshot an example:
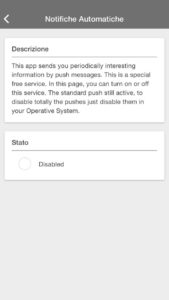
The first thing to do is click on SETTING and modify the DESCRIPTION. This description should explain the user that the APP he downloaded has an automatic push funnel, if the user want can disable any automatic push by clicking the option in the page. He will disable only the automatic push but the manual important one sent from App Owner still active.
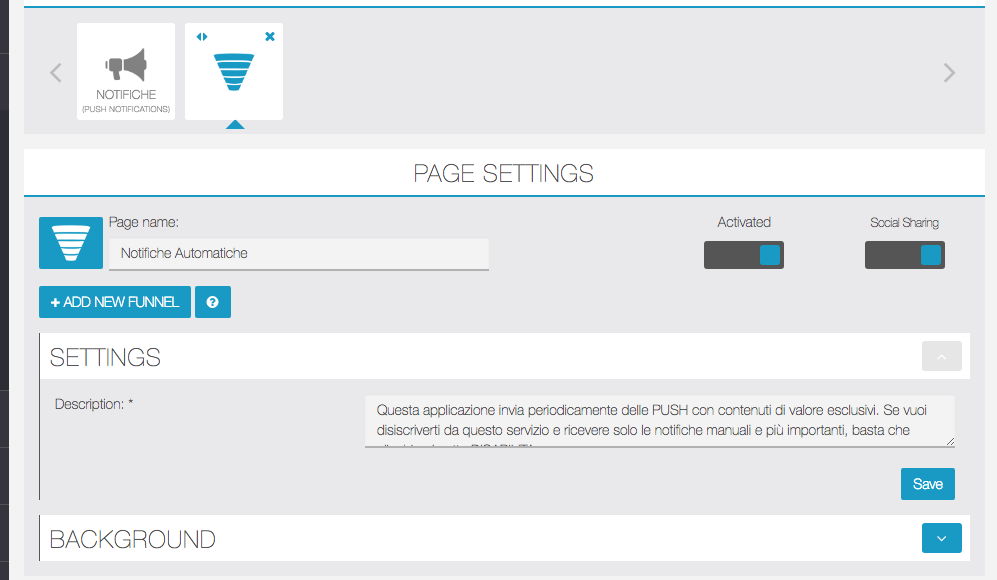
After you set the correct description, you can select ADD NEW FUNNEL as the picture above.
You will see a new page, as the screenshot below, where is possible to add the following details :
- TITLE, is the name of your funnel, useful to find it in the list of funnels you have (yes, you can set many push funnels)
- DESCRIPTION, is a small description that allow you to remember what is doing this funnel.
- TRIGGER, this is the event WHEN the funnel should start, select the one you need from the drop menu.
- STATUS, allow you to ACTIVATE or DISABLE the funnel. When you disable a funnel all the new users will be excluded from the funnel, all the old users will continue to receive the pushes scheduled. In other words the DISABLE is effective only for new users.
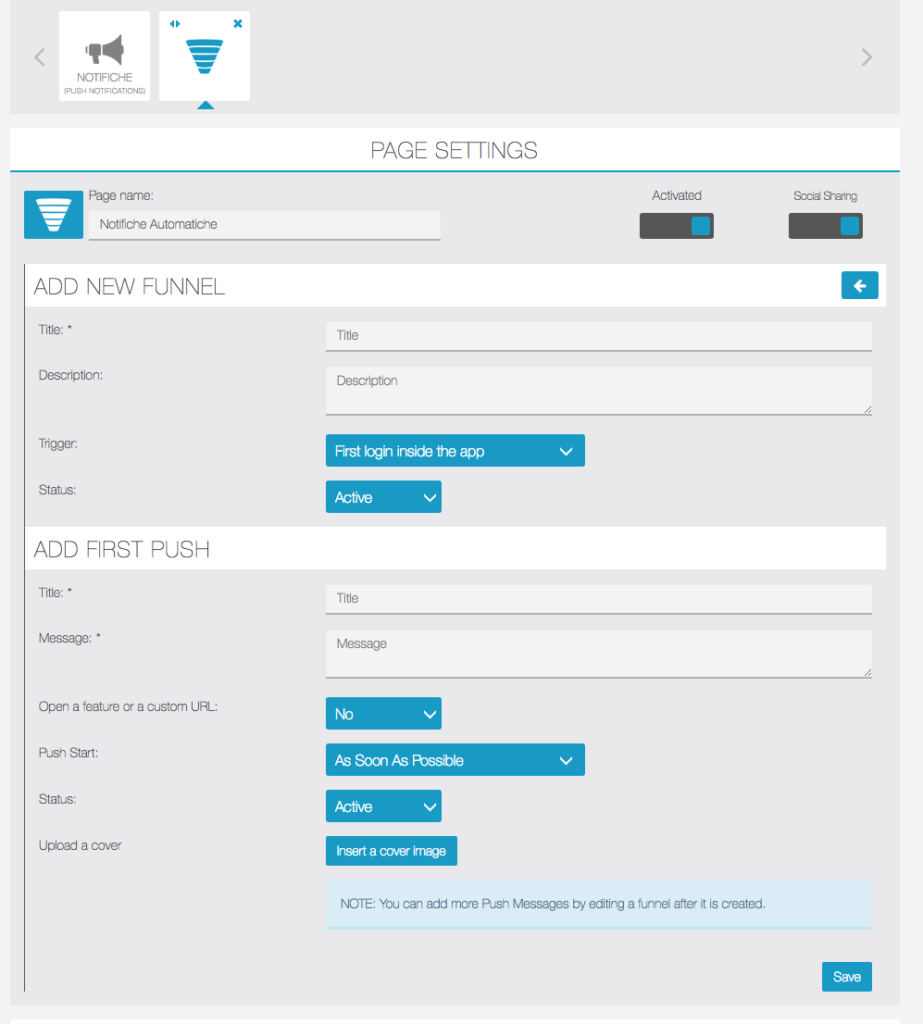
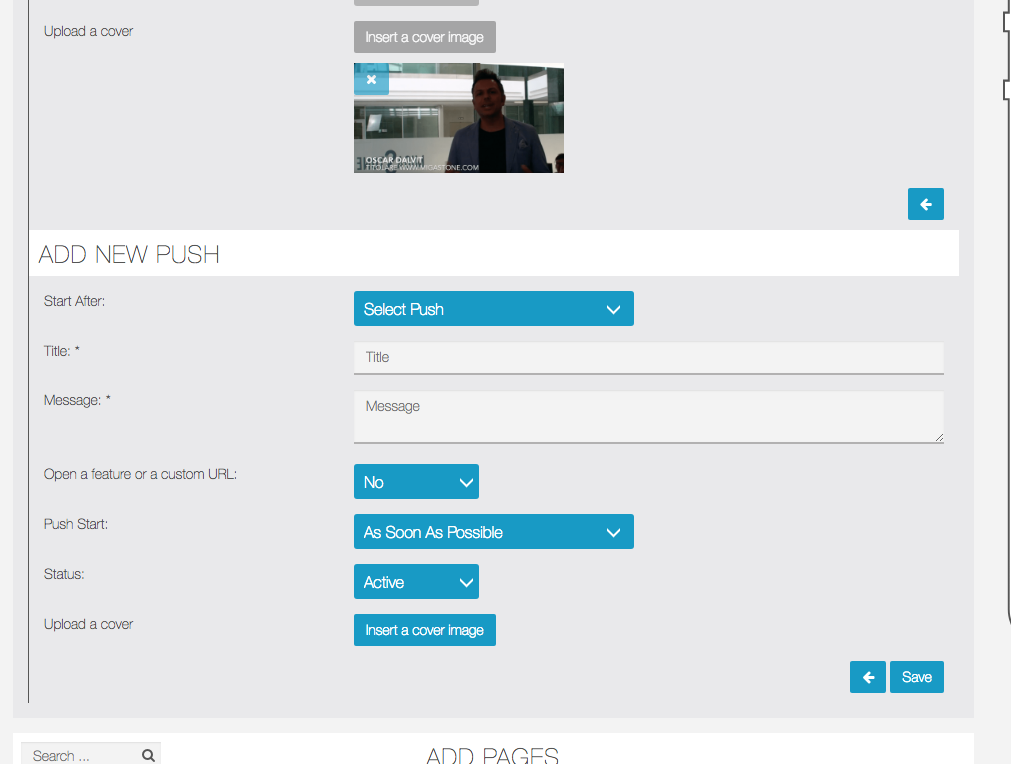
Set the first PUSH:
- TITLE, this is the title of the first push you are setting. This first push will be sent after the trigger/event happens according with the delay set (see later)
- MESSAGE, this is the text message of your push. Don’t add a long text, remember it is a notification not a letter ?
- OPEN A FEATURE or A CUSTOM URL, this option allows to bring the user to an URL or a specific page of your APP by clicking the button VISIT of your PUSH notification.
- PUSH START, this is the delay that you set from the event/trigger of this funnel. You can set SOON AS POSSIBLE, HOURS DELAY or DAYS DELAY as you want. The first push will start for example 1 hour later the trigger “first registration of the user”
- IMAGE, you can upload an image that is showed with the push.
As you can see in this screenshot we set the first push with all the details required:
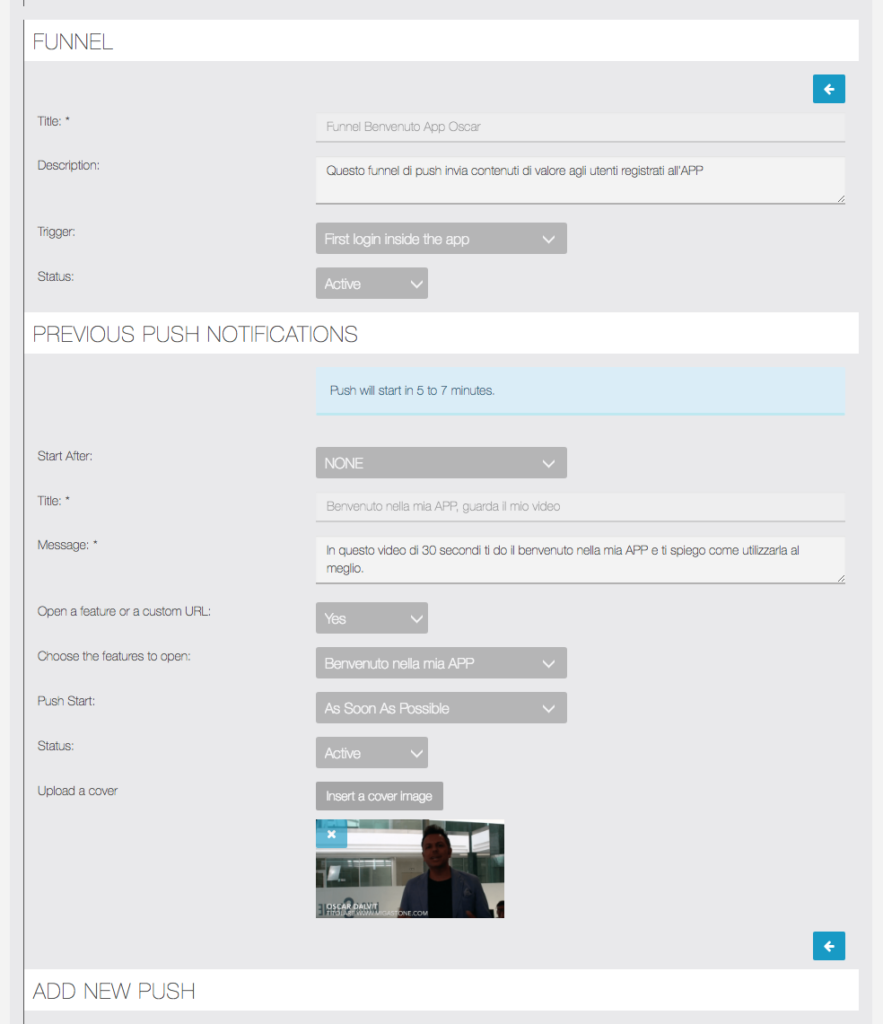
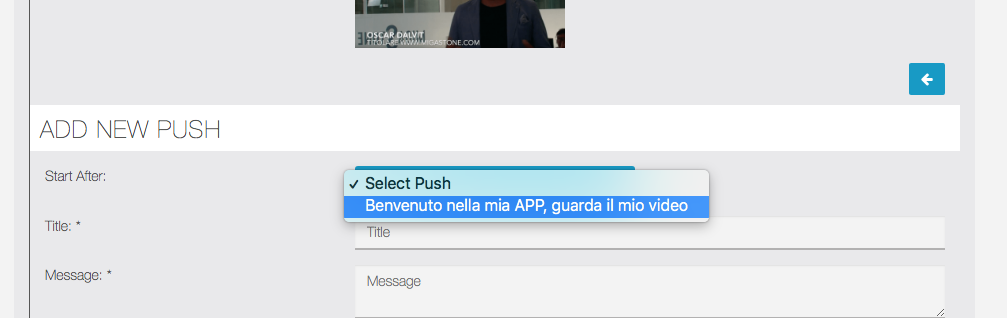
Now you can start to add more pushes, the concept is that every push is linked to a previously one with a “delay” set. You can choose any of the previously push as a trigger. In this screenshot you see the ADD NEW PUSH tab:
As you can see in the next screenshot, START AFTER is a menu that allows to select one of the previously push available. In this screenshot you see only one push available, the first one:
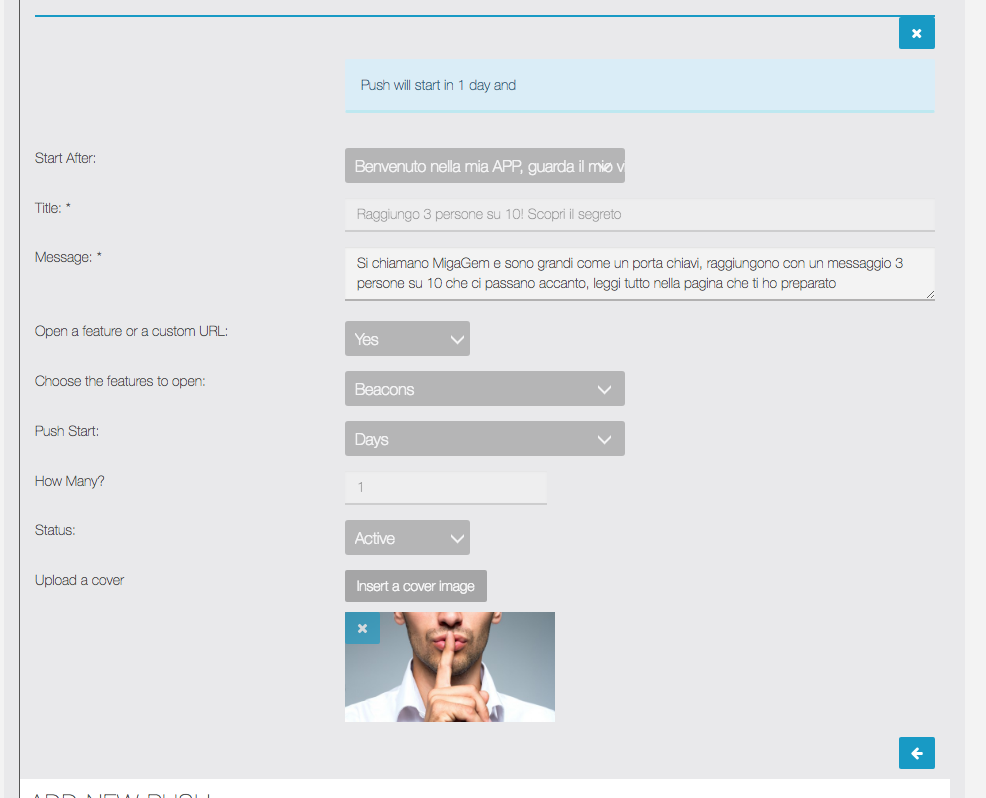
After selected the START AFTER push, we set a delay of 1 day, in other words this new push starts exactly 1 day after the first push is sent, as you can see in the screenshot below:
IMPORTANT NOTES:
- All the push notifications scheduled per user are saved in the principal PUSH NOTIFICATION history of push that you normally find in the PUSH NOTIFICATION feature of your APP.
- When an user UNSUBSCRIBE from the push notification service, all the pushes scheduled to reach this user are automatically deleted.
- Every time a PUSH is deleted from a funnel all the scheduled pushes related this specific push are deleted.
- You can delete a push funnel when inside it there is the FIRST PUSH only, so if you want to delete a funnel first delete all the other push stored.
Email Funnel
The new Migafunnel v2 module now allows setting up email funnel, thanks to the interface with the most popular email marketing platforms.
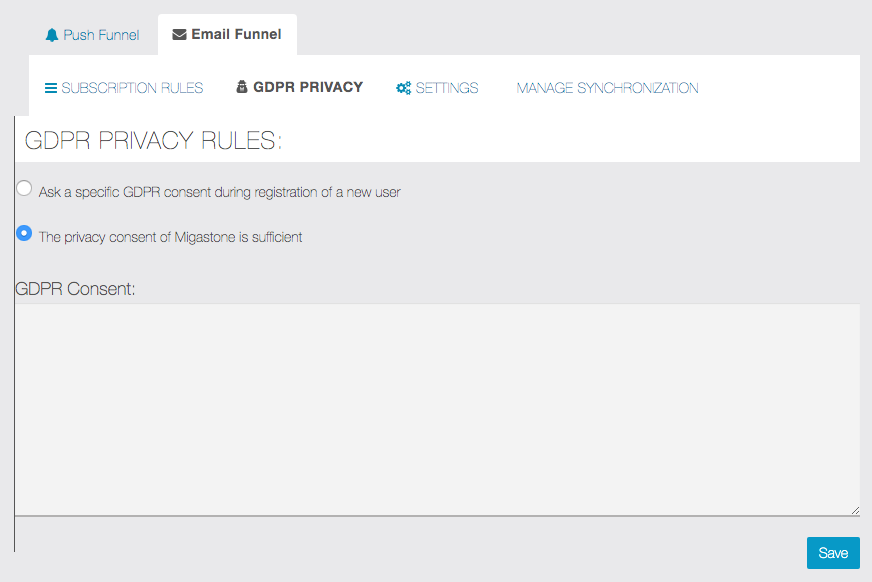
First select GDPR PRIVACY and choose whether to use the default information or enter a custom text:
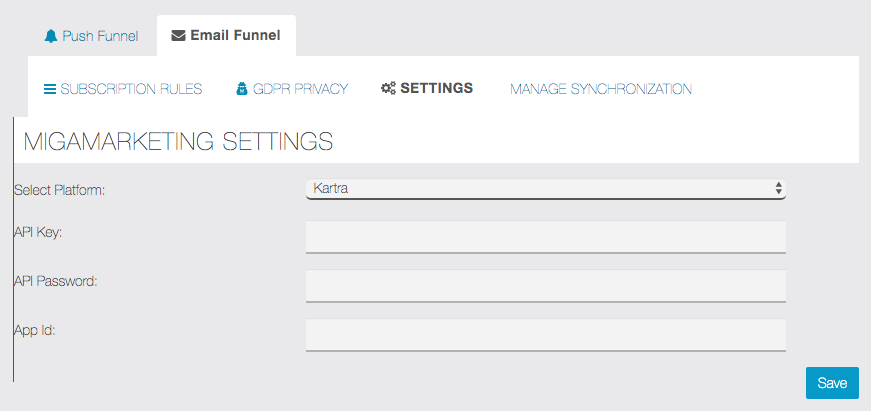
The next step is to choose the platform and the related access keys, from SETTINGS, the following platforms are currently supported:
- www.kartra.com
- www.mailchimp.com
- www.sendingblue.com (free service)
Finally set the rules for registration. It is possible to select a different list and possibly a different segment for each trigger (action performed by the user in the app). It is however necessary to make the setting for all the triggers present in the list.
Each time the user performs one of those actions his email will be imported into the corresponding list of the chosen email marketing platform.
NB: the import does not take place immediately, the synchronization will be done automatically several times a day.