The Progressive Loyalty Card module will allow you to launch a loyalty program and reward your customers as they buy from you. On the same loyalty card, you can setup several rewards and the customer will be able to redeem them as enough points are accumulated. With a powerful reporting engine, you can easily identify your most loyalcustomers and how many rewards are used. You will also get an estimate on the sales that the loyalty program is generating you. Finally, you can track the employees who validate the points and the rewards so that fraud is under control.
Setup
You’ll need to access the Loyalty Cards tab in order to begin this process:

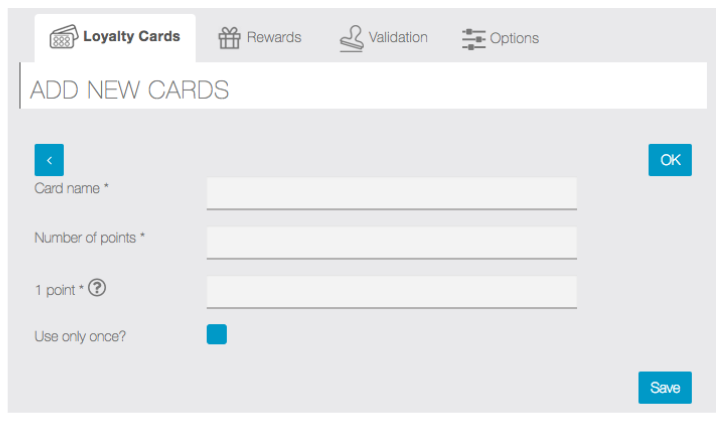
A. Loyalty Card The first step is to create a loyalty card. You’ll need to name your card –this will be used on the reporting but won’t be seen by the users -, set the number of points for the card, define whether this is a unique card or if it will be reused once completed and, finally, set the approximate amountthat each point is worth in sales –this will be used in the reporting to estimate the worth of each client:
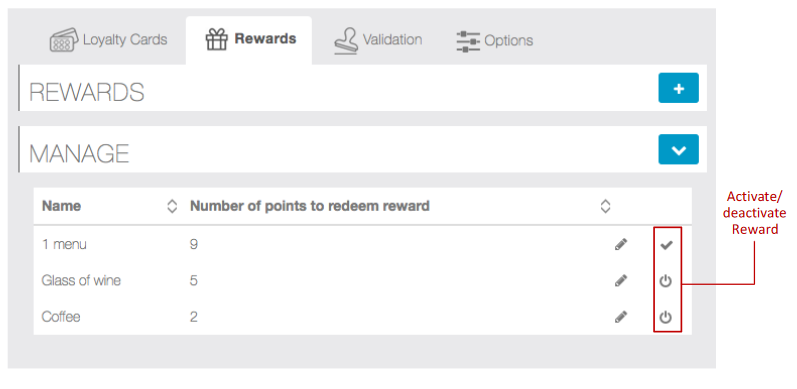
B. Rewards Once you’ve created the Loyalty Card, the second step is to create the Rewards. Please note that any reward that you make active/inactive will be immediately active/inactive on the card.
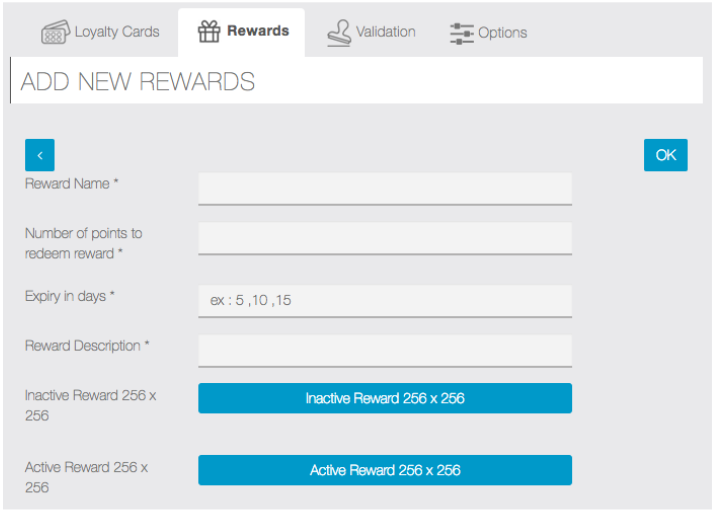
You can create a Reward by clicking on the plus sign. You’ll need to define the reward name and enter a description –both these fields will be visible to the user -, set how many points are needed to redeem this reward and you can uploadspecific images for it.The Inactive Reward image will appear when the user still doesn’t have enough points to redeem it. Once the user has enough points to redeem a reward, the Active Reward image will be shown. Similarly, the Redeem button on the app for this reward will change color. If you don’t place any images here, the default ones that are uploaded under the Options tab will be used:
Please note that, once a reward is created, you’ll need to activate it before it will be displayed on the card.
Take in consideration the concept of expiration to the Rewards. Thus, when you create a reward, you can define that it will expire 30 days after it is earned by the user. This creates urgency so that theuser comes back to the shop to redeem the reward and, hopefully, an additional purchase.
C. Validation With the Progressive Loyalty module you’ll be able to validate points remotely, you don’t need to have physical access to the mobile phone to do it. This is ideal fortake-out businesses or any typeof phone ordering services. You can still validate points using the customer’s mobile phone by creating employee pin-codes.
Once you access the module, an employee will beautomaticallycreated using your Zero Codes front-end user -please make sure you havefilled outyour user details (first and last names), otherwise the user will not be automatically created. This employee cannot be deleted but you’ll need to define a 4-digit pin-code in order to validate the points on the card. Please note that, via the editor, you will not be able validate points remotely with another user’s pin-code. You are free to add additional users to validate points on the App but, through the remote validation interface on the editor, only the logged-in user will be able to validate points with the created pin-code:

The users show on the Manual Validation list are the ones who have signed up for this App. They’ll be added to the module automatically as they sign-up.
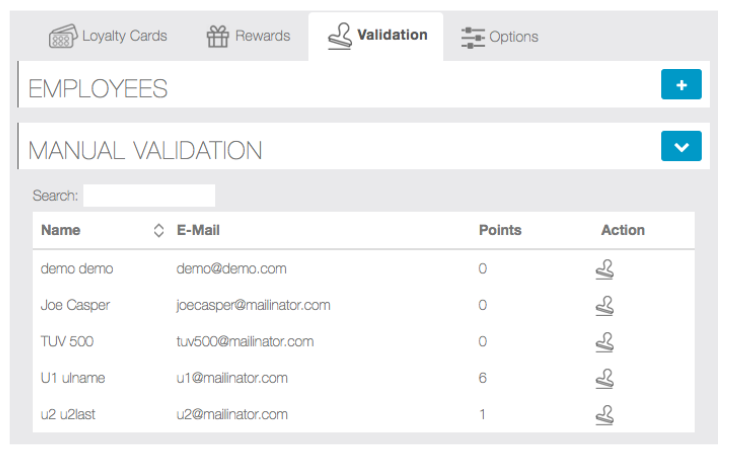
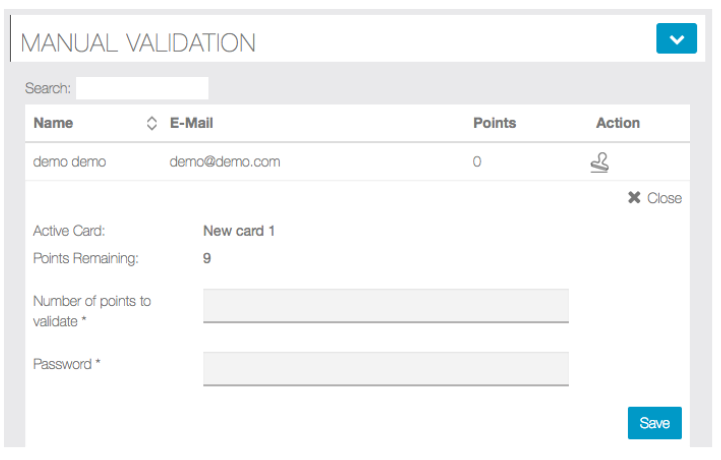
To validate the points via the backoffice, you’ll need to select the user and click on stamp icon . You’ll need to set the number of points that you’d like to validate and enter the 4 digit pin-code that you’ve set:
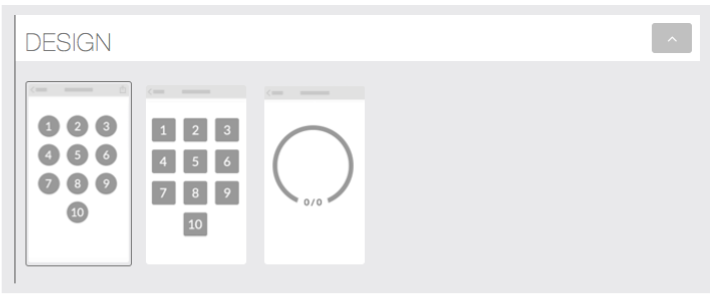
D. Design Once the card and rewardsare setup, you can decide which layout to apply to your loyalty card –these are optional but will allow you to customize your loyalty card to your design needs.
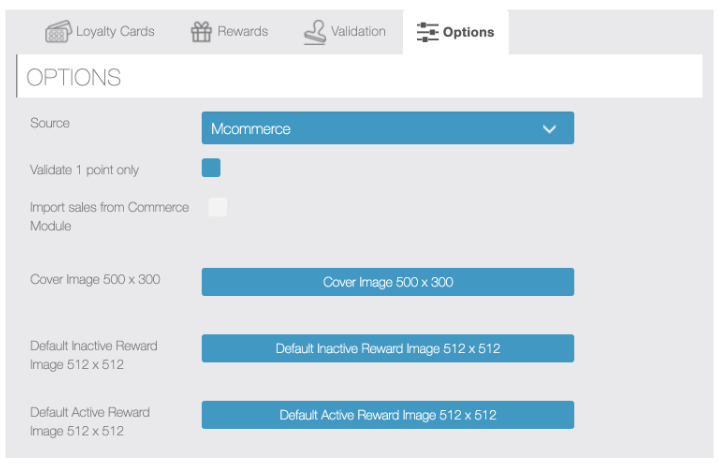
E. Options The last step is to set default options–these are optional but will allow you to customize your loyalty card to your design needs. Additionally, you’ll be able to control if employees are able to validate 1 or more points at a time. If “validate 1 point only” is not selected, the employeeat the storewill be able to validate several pointsthrough the Appat once.
You’ll be able to define if you want to import salesfrom Mcommerce or from MobilCart. When the“import sales from Commerce module” box is selected, you’ll be able to define a conversion rule for the sales that are done. You should define a rule with the lowest amount of sales you want to convert into points. Only full integer points will be converted, nodecimals are calculated for points. This means that, if the rule is to convert 1 point for each 10€ in sales, then on an order of 11€, the user will get 1 point. The same if the order if for 19€. The points conversion only occurs once an hour whenever the order status is marked to “Done”.
F. Colors You can set the color on the Progressive Loyaltymodule by changing the Card and Button colors on the Zero Codes Colors tab. Additionally, if you want to change the points default background color, you can do it using the following advanced SCSS code:
img.square{background-color: #EBB19E;}–for square points design
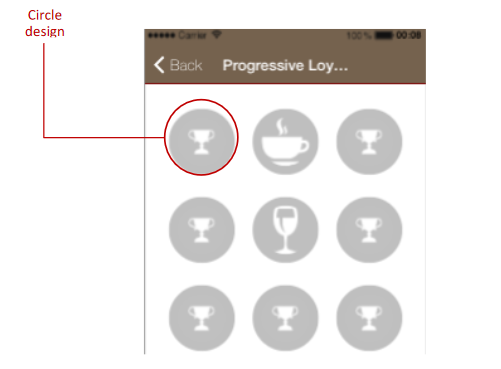
img.circle{background-color: #EBB19E;}–for circle points design
Reporting
The analytics of this module have been created to help businesses identify their most loyal customer and cater to them.
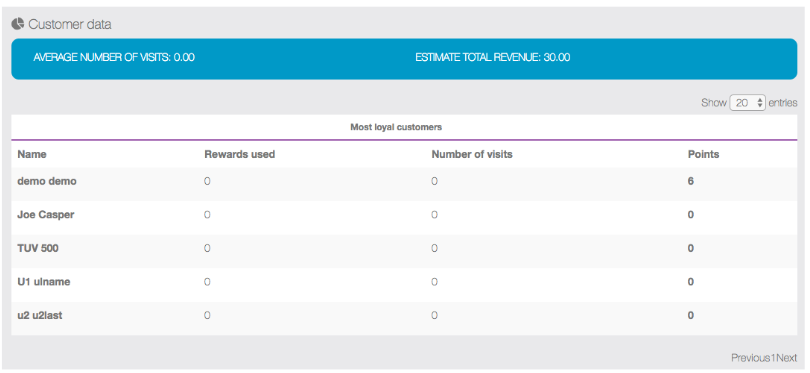
On the customer data dashboard,you’ll be able to get the number of rewards used per each customer, the number of points that were validated and the number of visits that have been made by this customer to the store. Please note that we’re making an assumption that each point validated was the result of a visit to the store. However, if points are validated several times within a2-hourperiod, we will only count 1 visit. The total revenue is calculated using the estimate value for 1 point when set when creating the card and multiplying it by the number of points validated:
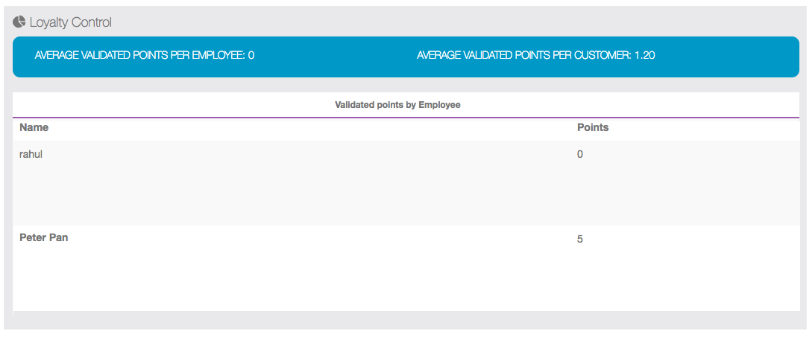
Loyalty control dashboard allowsyou to check how many points the employees are validating and what is the average for all employees. This will allow you to spot deviations from the average to quickly investigate suspicious cases.
Both the Customer and Loyalty Control Dashboards allow you do drill down to a more detailed report to show you individual customer or employee activity. Just click on the customer or employee name to obtain more detailed information.
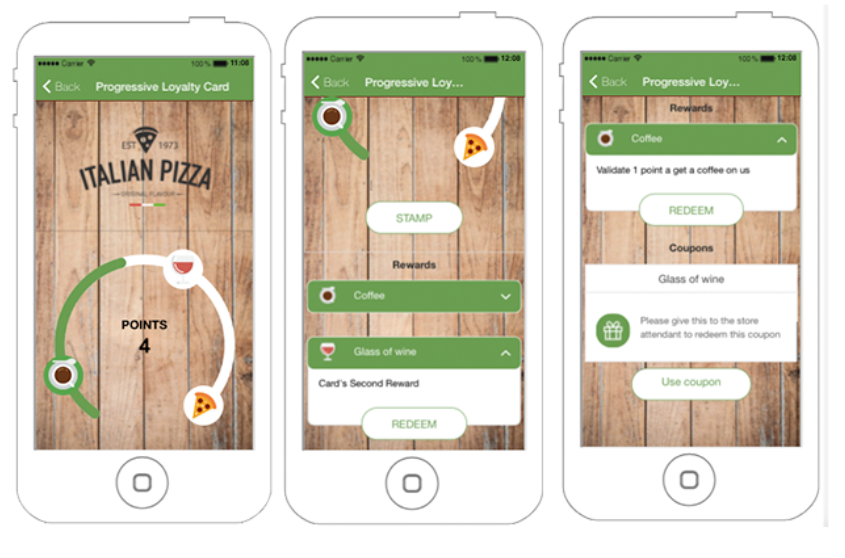
User Frontend Interface
Below you can find the user frontend interface screens: