Our Property Listing function enables you to have a property listing app that contains numerous property related features! This includes the app user searching properties by property type, the number of bedrooms, location, etc. The app user can also add properties, favorite properties, review properties that the previously viewed, send a message to the property owner, and report properties.
Setup
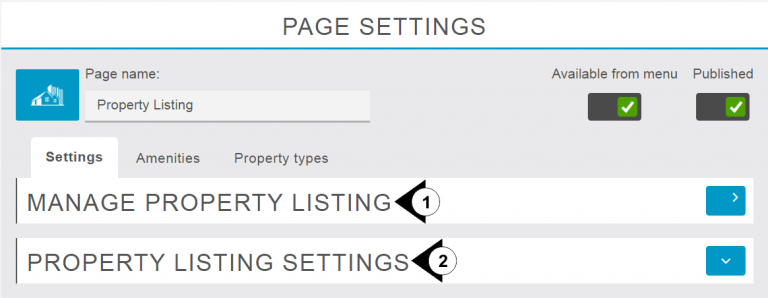
Under Page settings we have three tabs Settings, Amenities and Property Types. Under settings tab we have two sections first is MANAGE PROPERTY LISTING and second is PROPERTY LISTING SETTINGS.
Manage Property Listing
Under This section we can see or manage all listings and create new listings. Admin can allow or reject the publishing of listing submitted by users. we can edit or delete the existing listings from here and also able to see feedbacks and Messages of visitors and replied on that.
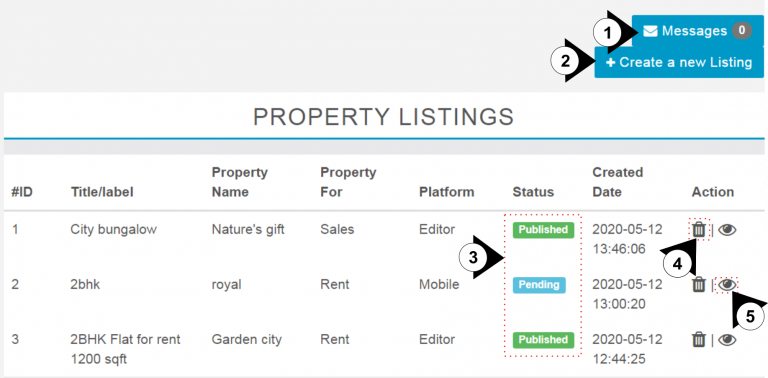
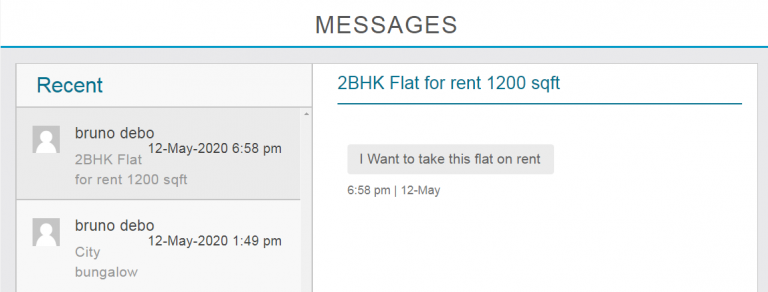
1.Click Here to see messages and replied on it accordingly.
2. By Click on Plus button you can create new listing with complete details of property.
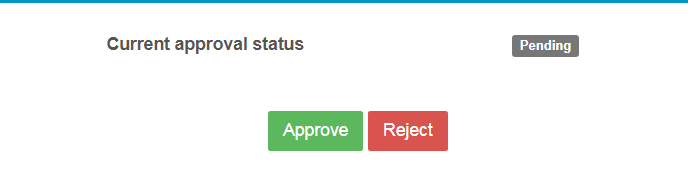
3. Here you know about published properties and pending properties. If you want to publish pending properties, you need to click on the view Eye icon to see the listings details and required to click on green “Approve” button to publish the property in the app.
4. By Click on the Delete Icon you can delete the exiting or wrong listings from the app. As you click on delete button confirmation pop-up window will open and ask you to click on “Yes, delete” else Press on “No, go back” to remove the listing.

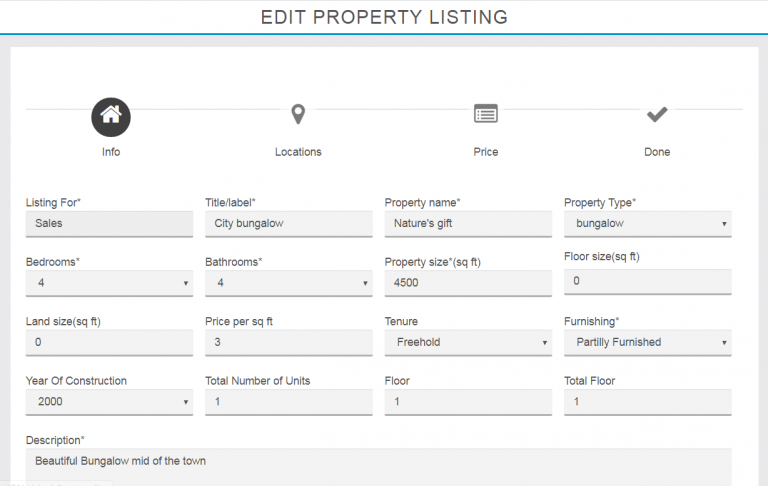
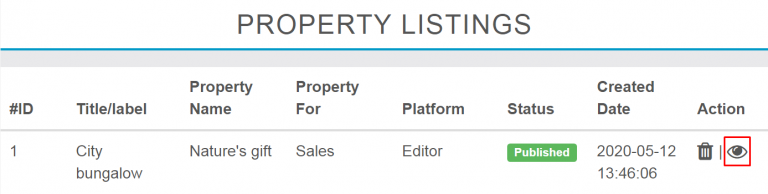
5. By click on View Eye Button you can see or edit on existing listings. Let’s see below are the steps how to edit exiting listings.
Step one: Click on View Eye Button under property listing section.
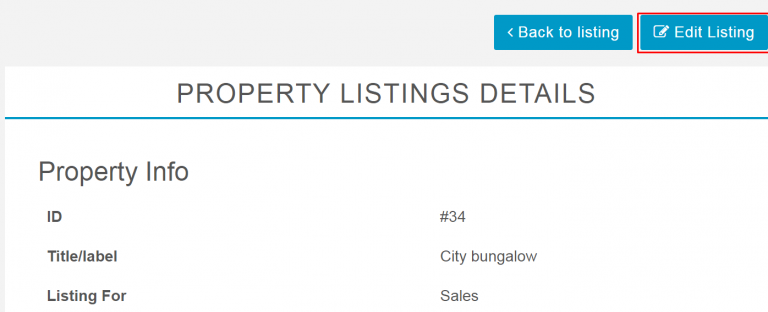
Step second: Click on Edit Listing button then edit your information click on next to change the pages then click on save button to update.
Property Listing Settings
Under Property Listing setting you can manage multiple settings in the app like listing settings for App, Features settings, Filter settings and Notification settings.
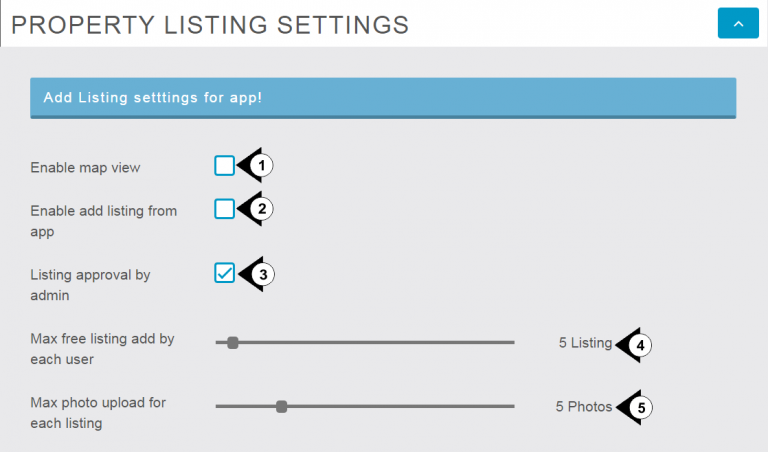
1.Enable Map View: By Check Marks on check box you will activate Map View function which is shown on the top of property listing (Home) screen of your app.
2. Enable add listing from app: By Check Marks on check box you can allow or restrict the listing from app.
3. Listing approval by admin: By Check mark on it you can activate the approval is required by the admin before publish the property on the portal. But if you did not mark in check box it will directly allow users to publish without admin’s approval.
4. Max free listing add by each user: From here you can set the maximum limit of listings for each user.
5.Max photo upload for each listing: Here you can set the limit of photos uploading with each listing.
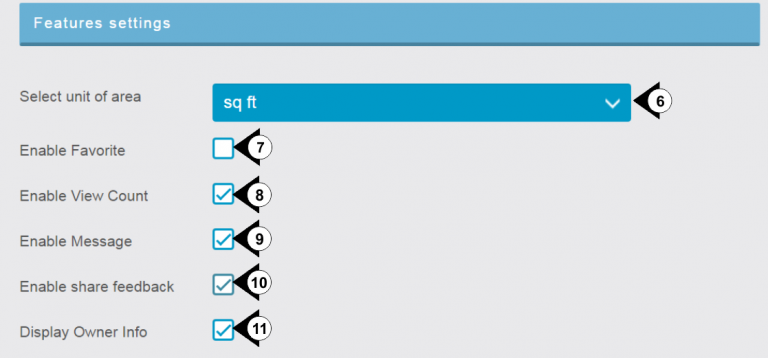
6. Select Unit of area: By click on this drop and down button you can select the are measurement unit like: square feet (sq ft), square meter (sq m), square yard (sq yd), Acre, Hectare.
7.Enable Favorite: By check mark on check box you can Activate or Deactivate the Favorite function in the App.
8.Enable View Count: By check mark on check box you will show or hide number of visits on a particular listing.
9. Enable Message: By check mark on check box you can allow or restrict the users to message regards listing by show or hide the “message” option from menu.
10. Enable share feedback: By check mark on check box you can hide or show “share feedback” options from menu.
11. Display Owner Info: By check mark on check box you can hide or show Owner Info from listing detail page.

12. Enable Property Type: With check mark you can enable filtering properties according to the type of property like Apartment, Flat, Villa, Shop etc.
13. Enable Bedroom: With check mark you can enable or disable filtering properties according to Bedrooms.
14. Enable Bathroom: With Check mark you can enable or disable filtering properties according to bathrooms.
15. Enable Price: With Check mark you can enable or disable filtering properties according to Price range.

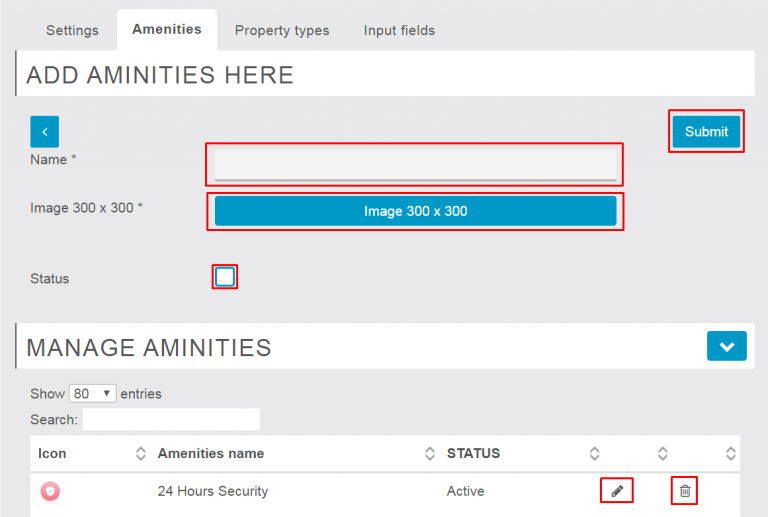
Amenities
Under Amenities tab you found multiple pre filled amenities if you need to add new amenities you just need to click on plus blue button then enter the name of your new Amenity and upload the image with check mark on status check box to activate then click on submit button to save.
you can edit or delete the existing amenities.
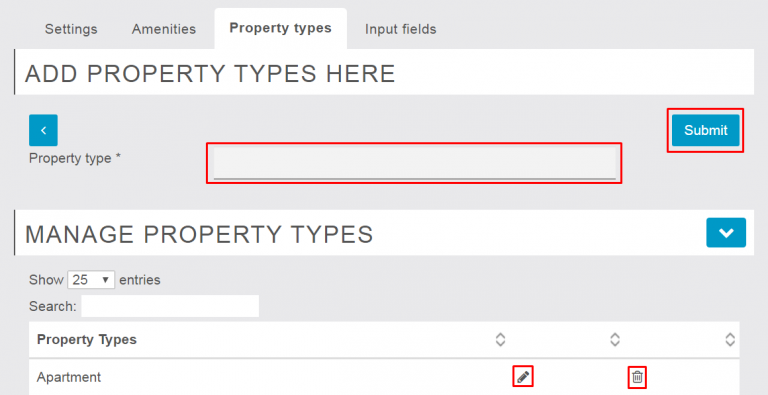
Property Types
Here you get some pre filled Property Types you can edit or delete them. By clicking on the plus button Then needs to enter your Property type, then click on the Submit button to add the new property type.
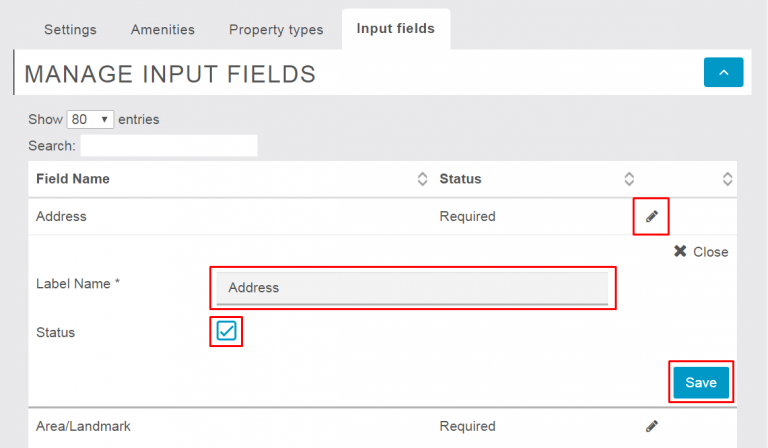
Input Fields
Here you can manage input fields for listing you can edit and activate or deactivate the input fields, but not able to add new fields or delete the existing fields. For editing you just need to click on edit icon then reenter your new text if you want to change the Label name of Fields.
Check mark on check box to activate or deactivate the input fields, then click on save button to execute the action.
Membership Plans
Under membership section you can create your own memberships for property listings in the App. You can able to create multiple membership plans in the app as per your requirements. Let’s start how we can make a membership plan.
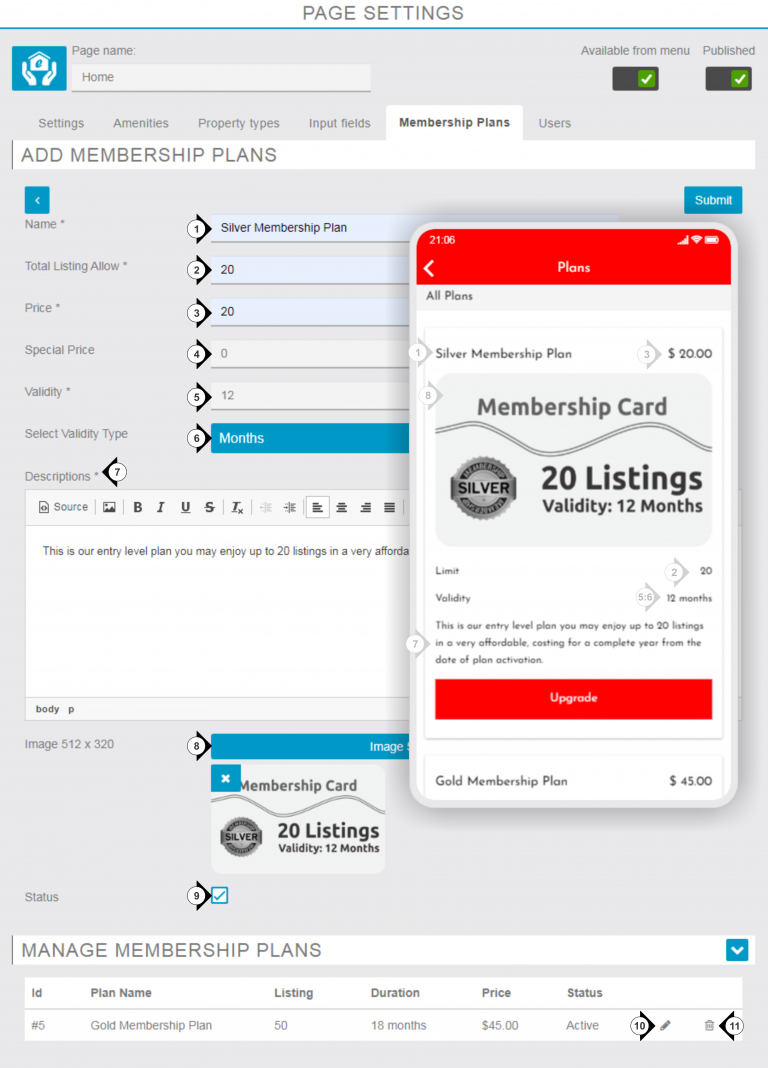
1) First we need to enter the name of the membership plan.
2) Second we need to mention the numbers of total listing we are allowed in the plan.
3) Here we need to enter the price of the plan.
4) Here we need to mention special Price if we offer some discounts.
5) Here we need to declare the validity of the plan.
6) Here we need to select Validity Type.
7) Here we need to give descriptions about membership plans.
8) Here you can upload the image for your membership plan.
9) By doing check mark on check box we can activate or deactivate the membership plan.
10) By clicking on edit icon we can amend our existing membership plans.
11) By clicking on delete icon we can delete the existing membership plans.
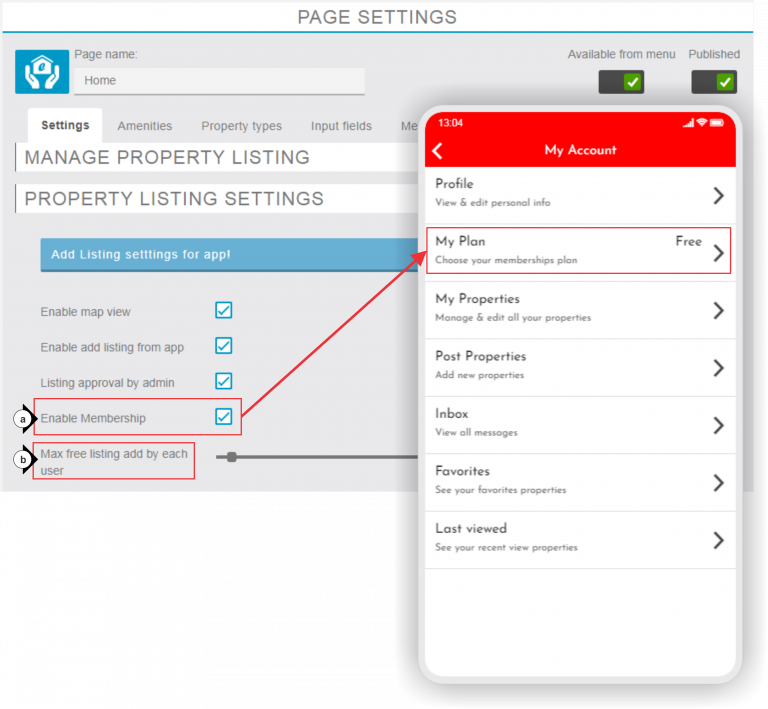
a) By doing check mark on check box you can enable or disable the membership plans. As you enable the membership from setting page by default free membership plan will be activated for all users and they are able to list up-to 5 properties for one year from the date of free plan activation.
b) From here you can able to change free listing offering from 1 to 100 properties for one year. It will be applicable to only new users after new the setting applied.