Routes will allow you to create & organize multiple routes from POI (Points of Interest)
This feature requires a Google maps API key, follow this link to learn how to create this API key.
First, click on the  icon the “Add pages” section, to add this feature to your app.

- “Default page“: Categories, or Routes, will set the default homepage
- “Distance unit“: Will determine whether to use kilometers or miles.
- “Display navigate to POI action”: When enabled, user will be able to open a navigation intent to the selected POI (from within the details modal)
- “Display approximate distance from user location to POI”: When enabled, user will see the approximate route distance between his position and the selected POI, passing by the closest POI on the route. Note: this will work only when the route is available with Driving, Bicycling orWalking navigation modes.
- “Routes image priority in list“: When set, the thumbnail will default and fallback in the defined order.
- “Default pin for now POIs“: This option determines which image to use as the default map pin for every new POI.
- “Apply default pin to all existing POIs“: This action will apply/replace all individual values in existing POIs to the selected `default pin value`.
- “Start color” / “End color”: Route line color, when colors are different a gradient is build between the colors from the first POI to the last.
- “Stroke width”: Line width on map
- “Stroke opacity”: Line color opacity on map
Click on ![]() .
.
Now you will have to create Categories:

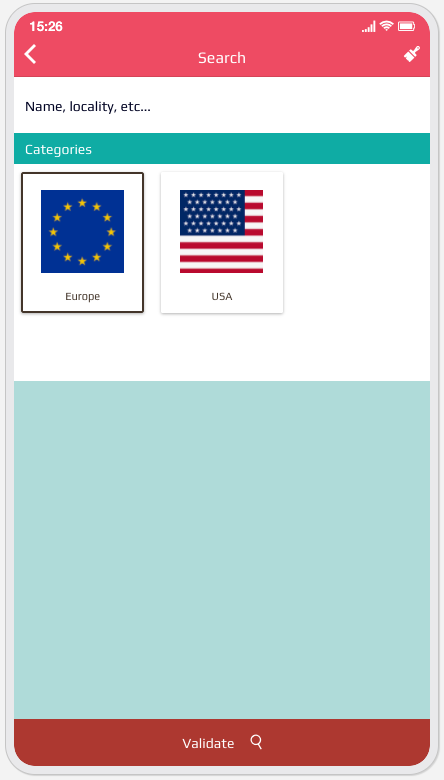
You can create as many categories as you want, then you will be able to sort them, all categories are selectable/searchable in the application filters.
Then you can create your various POIs:

Every POI has is defined with:
- “Title“: The POI name, label, title.
- “Description“: A complete description of the POI.
- “Thumbnail“: A thumbnail image to be displayed in the list view.
- “Illustration“: An image or photo to be displayed in the “details” tab.
- “Pin“: An image to use as a pin on the map.
- “Map icon“: Which image to use as a pin on the map (thumbnail, illustration or pin).
- “Address“: The POI textual address, will autocomplete latitude & longitude if found in the live google search.
- “Latitude & Longitude“: Coordinates of the POI.
The address will pop a google search, but you can also manually set the latitude & longitude if the address doesn’t exists.
And finally, you can organize your Routes

Every route can be described as:
- “Title“: The route name, label, title.
- “Subtitle“: The route subtitle, to be displayed in the list for extended information.
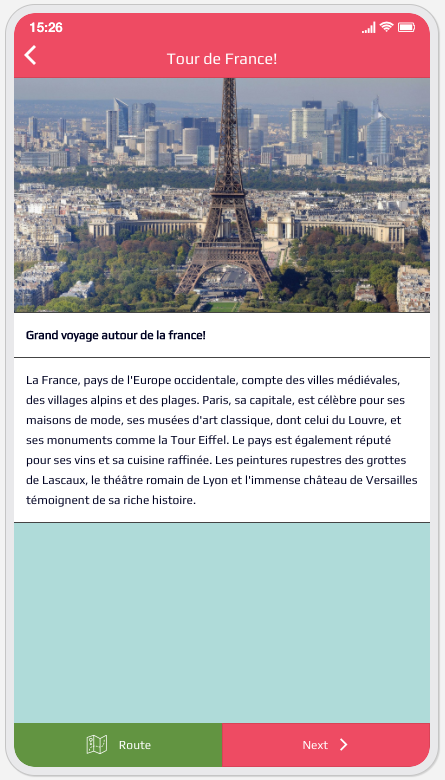
- “Description“: A complete description of the route.
- “Thumbnail“: A thumbnail image to be displayed in the list view.
- “Illustration“: An image or photo to be displayed in the “details” tab.
- “Category“: The category to which this route belongs.
- “Navigation mode”: Defines the route calculation mode with Google Directions API, can be “Driving, Bicycling, Walking or Disabled” if no route is found, or available, Disabled will draw straight lines between your POIs.
- “Is active?“: If you need to hide a route.
- “Add POIs to the route“: List of the POIs for this route, up to 25 POIs are allowed, you can sort them, the order will be used to create the route inside the application.
Inside the application and depending on your settings, you will either start with the Categories

Or directly with the list of available Routes
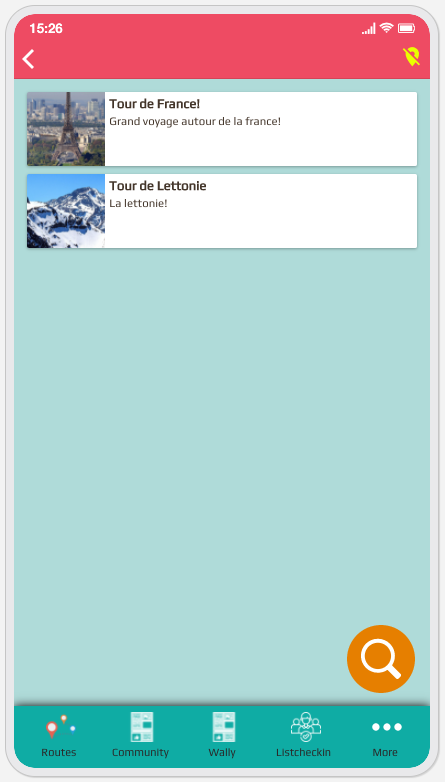
On the list view, user is also able to filter Routes with text search & categories
When selecting a given route, user will be directed to the Map view

And will be allowed to move around, and select any POI to get more information

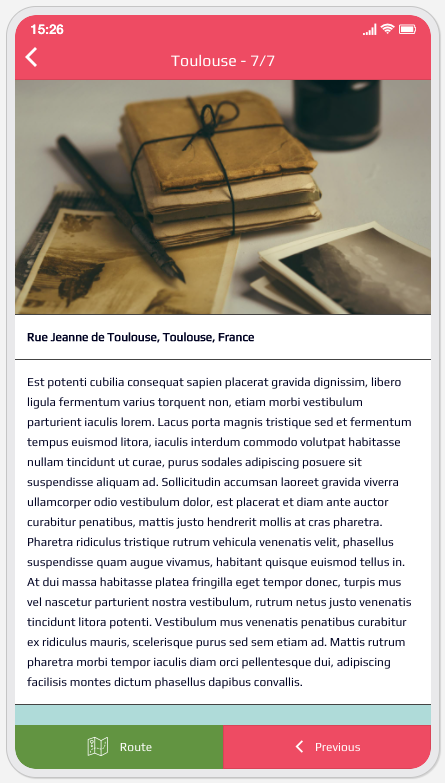
When on the POI details modal, user will also be able to get the actual Route details by taping on the “Route” action
The user will also be able to navigate sequentially between all the POIs for this route, with the “Previous” & “Next” actions.